
티스토리 뷰
아나콘다 환경에서 Stabel Diffusion(이하 SD)을 설치하는 과정을 설명합니다. SD을 실행하기 위해서는 파이썬 3.10이상의 버전이 요구됩니다. 아나콘다 가상환경을 이용하면 SD를 효율적으로 운영할 수 있다.
SD 운영 요구사항( Requirements)
- Windows
- 비교적 괜찮은 Nvidia GPU가 탑재된 괜찮은 PC
- Nvidia CUDA와 Miniconda 설치
그럼 시작합시다 !!!
아나콘다 프로그램이 설치되어있지 않다면 설치한다.
1. 아나콘다 프로그램 다운로드
아나콘다 다운로드 사이트(https://www.anaconda.com/download)에 접속하고 화면 왼쪽에 있는 다운로드 버튼을 클릭해서 설치파일을 다운로드 한다. 현재 기준으로 아나콘다 버전은 Python 3.11 • 64-Bit Graphical Installer • 904.4 MB이다.
Distribution | Anaconda
Anaconda's open-source Distribution is the easiest way to perform Python/R data science and machine learning on a single machine.
www.anaconda.com


2. 아나콘다 프로그램 설치
2024년 4월 22일 기준으로 다운로드 된 설치파일(Anaconda3-2024.02-1-Windows-x86_64.exe)을 더블 클릭해서 아나콘다 프로그램 설치를 진행한다.

프로그램 설치는 기본으로 설정된 값으로 진행하다가 다섯번째에 나오는 프로그램 경로설정을 위한 설치화면에서 맨 위의 옵션을 체크하고 진행하면 된다.

아나콘다 프로그램 설치 과정
<참고 사항>
GPU를 사용하기 위해서는 Nvidia CUDA 버전 12.1을 다음 사이트를 참조해서 설치하기 바란다.(이 글을 작성하는 현재 최신 버전 12.3은 Torch에서 작동하지 않는다).
https://developer.nvidia.com/cuda-12-1-0-download-archive
CUDA Toolkit 12.1 Downloads
developer.nvidia.com
3. Stabel Diffusion 프로그램 다운로드 및 설치
1 단계 . Stable Diffusion 관련된 모든 파일을 저장하는 폴더를 생성한다.
여기서는 C:\local_SD\로 한다. 프로그램 검색란에 cmd를 입력하여 Command 명령어 창을 연다.

그리고 C:\local_SD\ 폴더로 이동한다.
cd C:\local_SD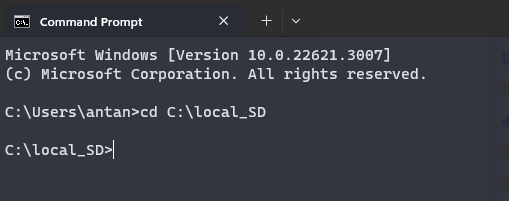
2단계. stable-diffusion-webui 프로그램을 다음 명령어를 이용하여 C:\local_SD\ 폴더로 복사한다.
git clone https://github.com/AUTOMATIC1111/stable-diffusion-webui.git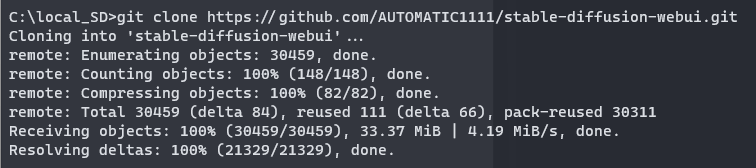
도스 명령어인 cd를 이용하여 stable-diffusion-webui 폴더로 이동한다.
cd stable-diffusion-webui
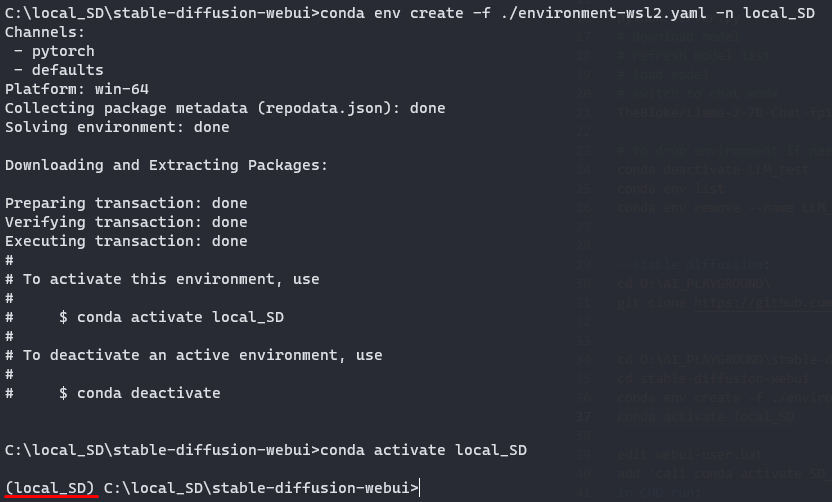
3단계. 다음 구문으로 아나콘다 가상환경을 생성하고 활성화한다.
가상환경 이름은 local_SD으로 하고 가상환경에 설치되는 패키지는 environment-wsl2.yaml 를 이용하여 설치한다.
conda env create -f ./environment-wsl2.yaml -n local_SD
다음 명령어 구문으로 가상환경 local_SD 활성화 한다.
conda activate local_SD
명령어 프롬프트의 맨 앞에 가상환경 이름이 나타나면 가상환경이 활성화 된 것이다.
4단계. Stable Diffusion 프로그램을 설치하기 위해서 webui-user.bat 를 수정한다.
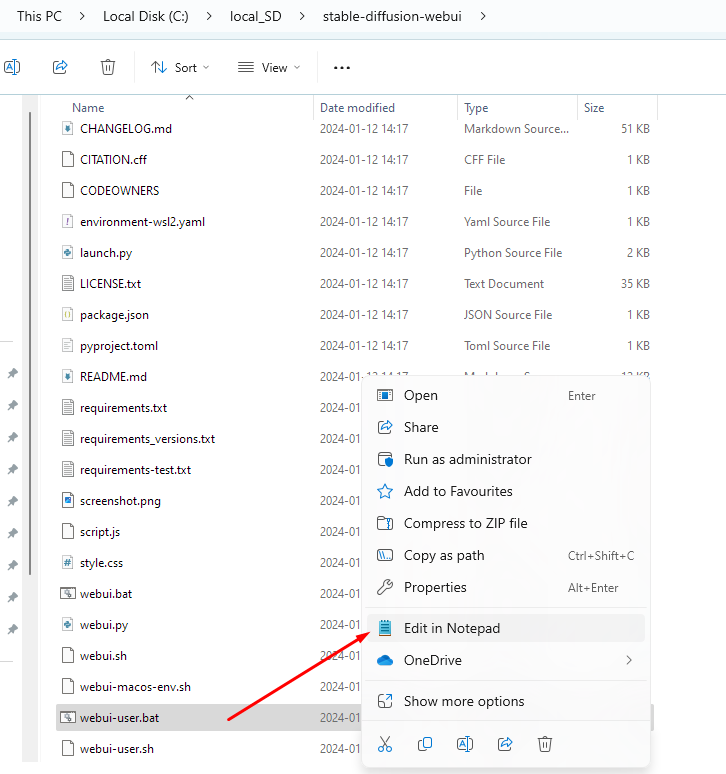
webui-user.bat 파일을 선택하고 마우스 오른쪽 버튼을 클릭해서 나온 팝업 창에서 "메모장에서 편집" 기능을 실행한 후
메모장에서 맨 위에 다음 구문을 추가하고 저장하고 메모장 프로그램을 종료한다.
call conda activate local_SD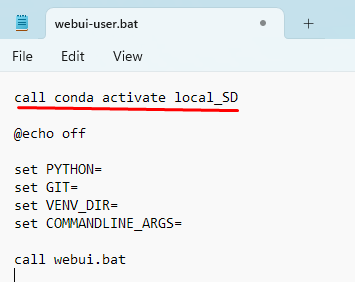
5단계. Stable-Diffusion-Webui 배치 파일을 실행한다.Stable Diffusion 프로그램을 운영하는데 필요한 파이썬 패키지를 설치한다. 상당한 시간이 소요된다. 커피마시면서 기다린다.
.\webui-user.bat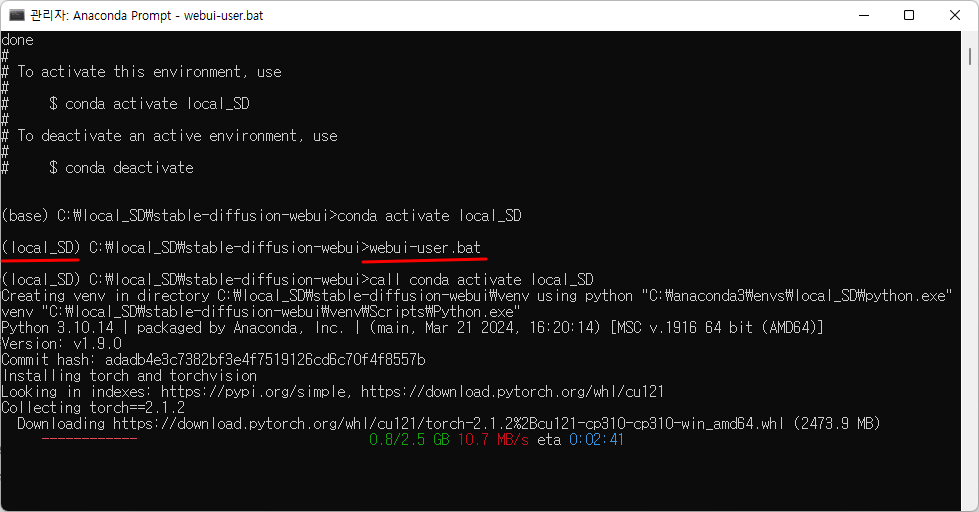
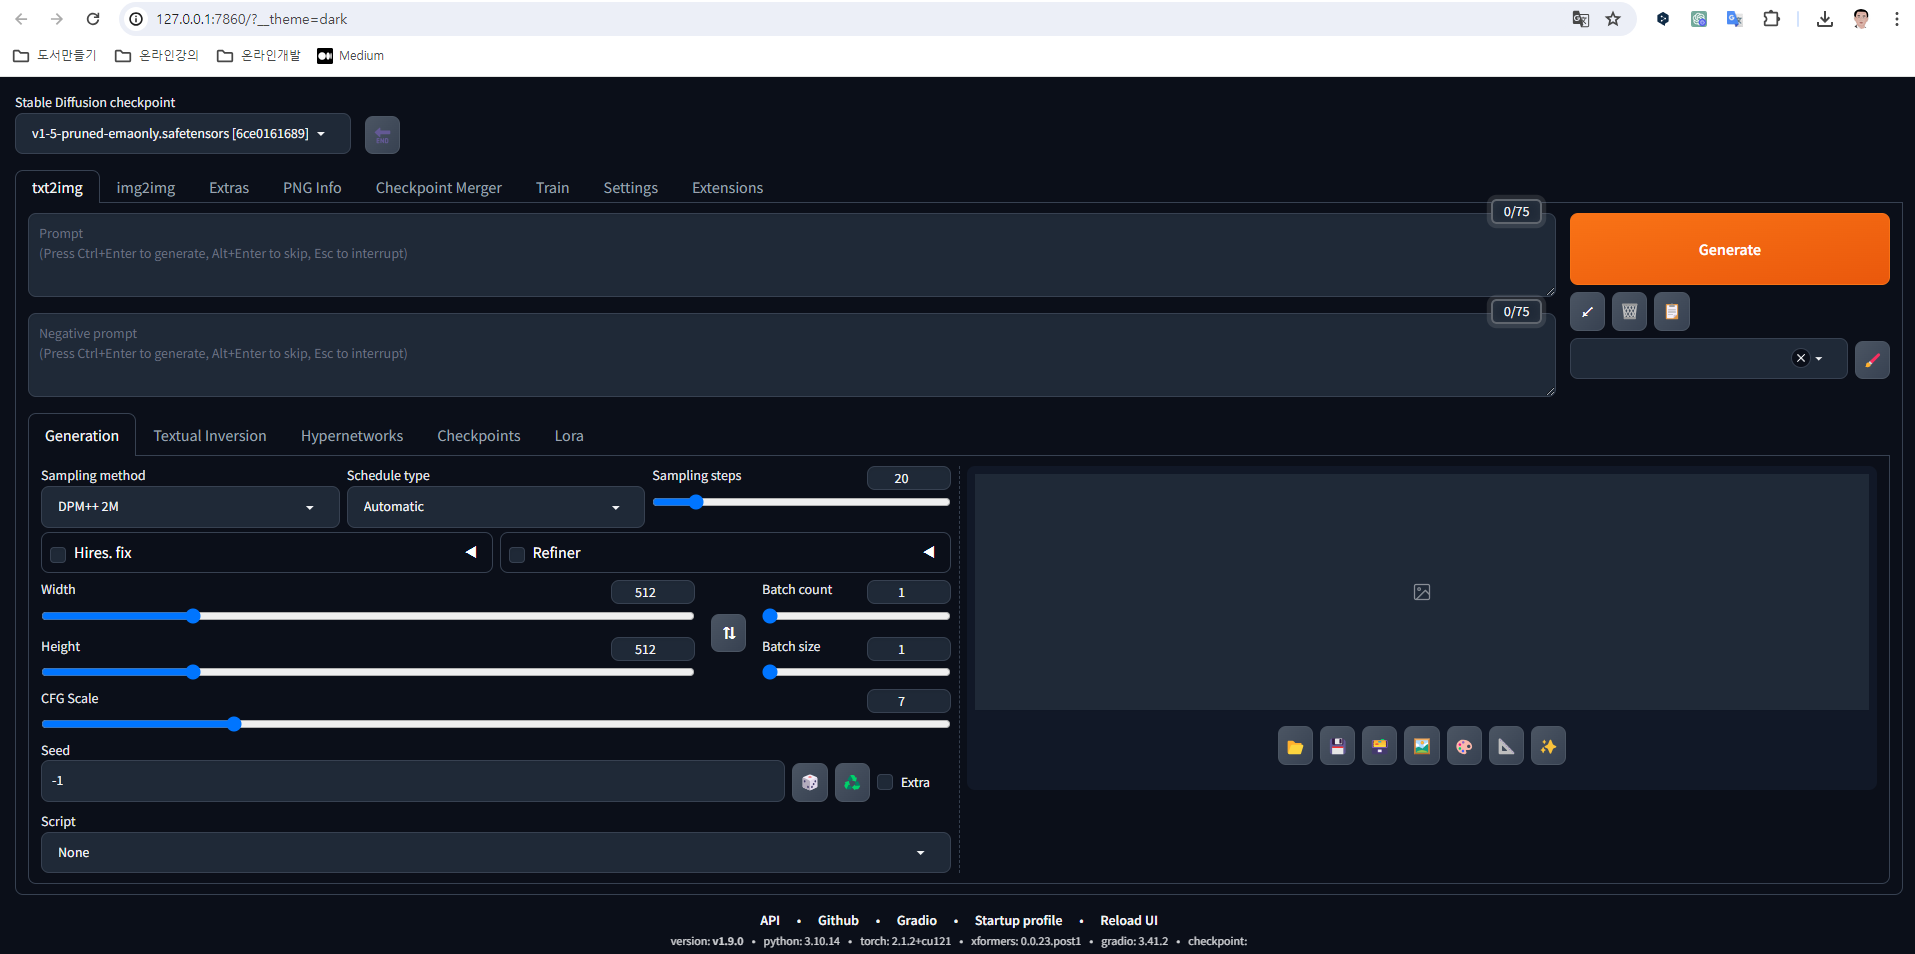
설치가 끝나면 WEBUI 자동적으로 실행된다. 아니면 사용자가 WEBUI 실행 주소(https://127.0.0.1:7860)를 웹브라우저에 직접 입력하여 실행하면 된다.

다시 실행하는데 성능을 높이기 위해서 webui-user.bat 파일에서 commandline_args를 부분을 다음과 같이 수정한다.
set COMMANDLINE_ARGS= --xformers --autolaunch --theme dark
다시 실행하기
아나콘다 프롬프트 실행하고 Stable-Diffusion-Webui 폴더로 이동해서 webui-user.bat 파일을 실행한다.

결과적으로 프로그램 화면이 어두운 스타일로 변경된 것을 알 수 있다.
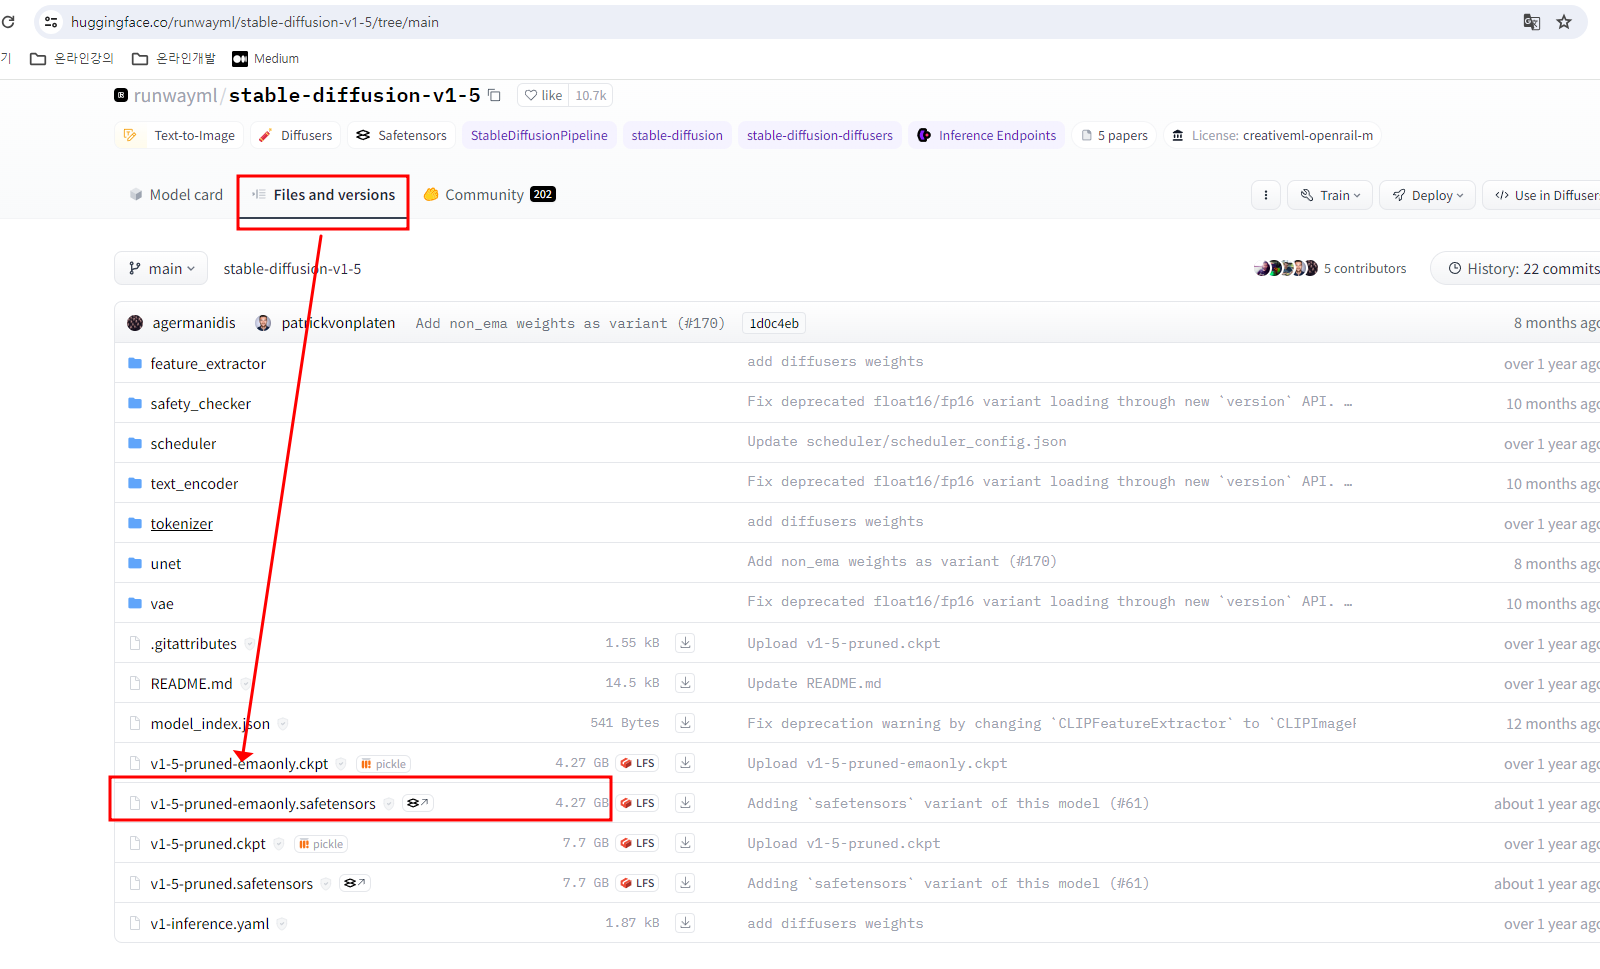
6단계. stable diffusion 프로그램에서 이용하는 기본 모델을 다운받고 불러오기
설치 과정에 기본모델이 설치되는데 그러하지 않으면 사용자가 Huggingface 사이트에 접속해서 직접 다운받아 설치폴더에 저장하면 된다.
Models - Hugging Face
huggingface.co

Civitai: The Home of Open-Source Generative AI
Explore thousands of high-quality Stable Diffusion models, share your AI-generated art, and engage with a vibrant community of creators
civitai.com
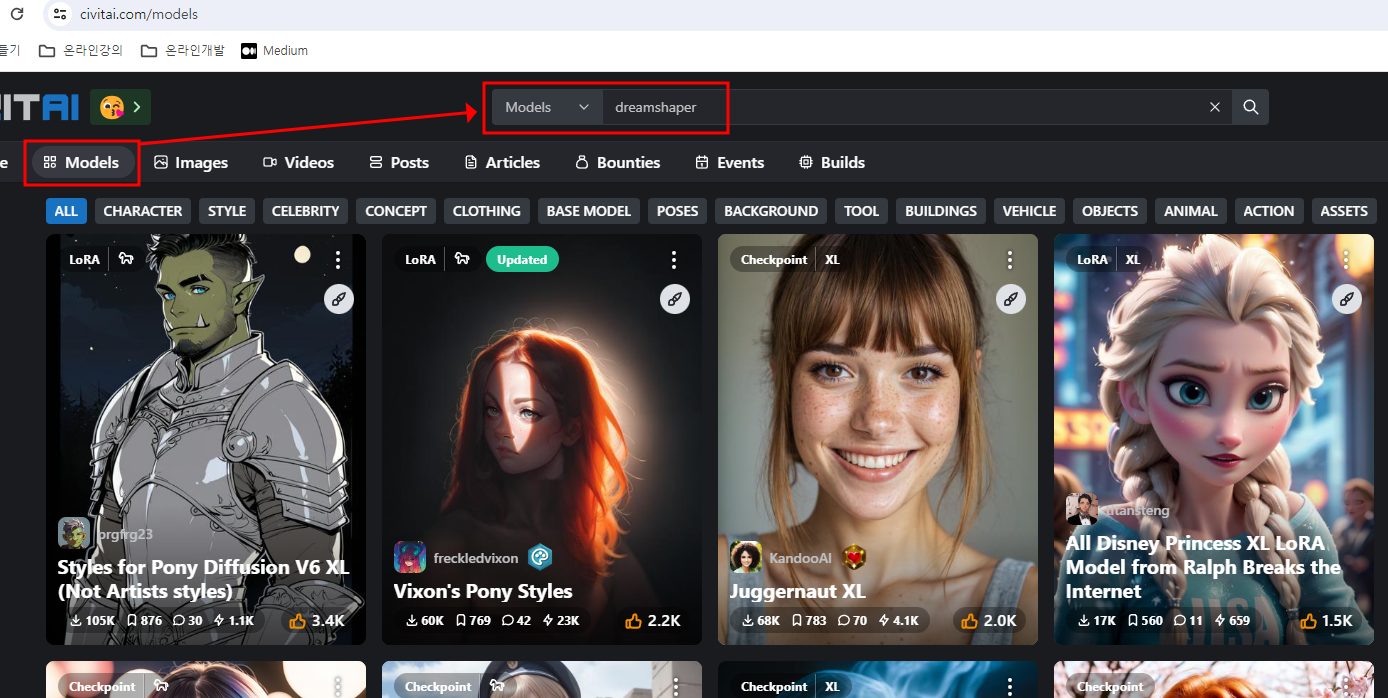

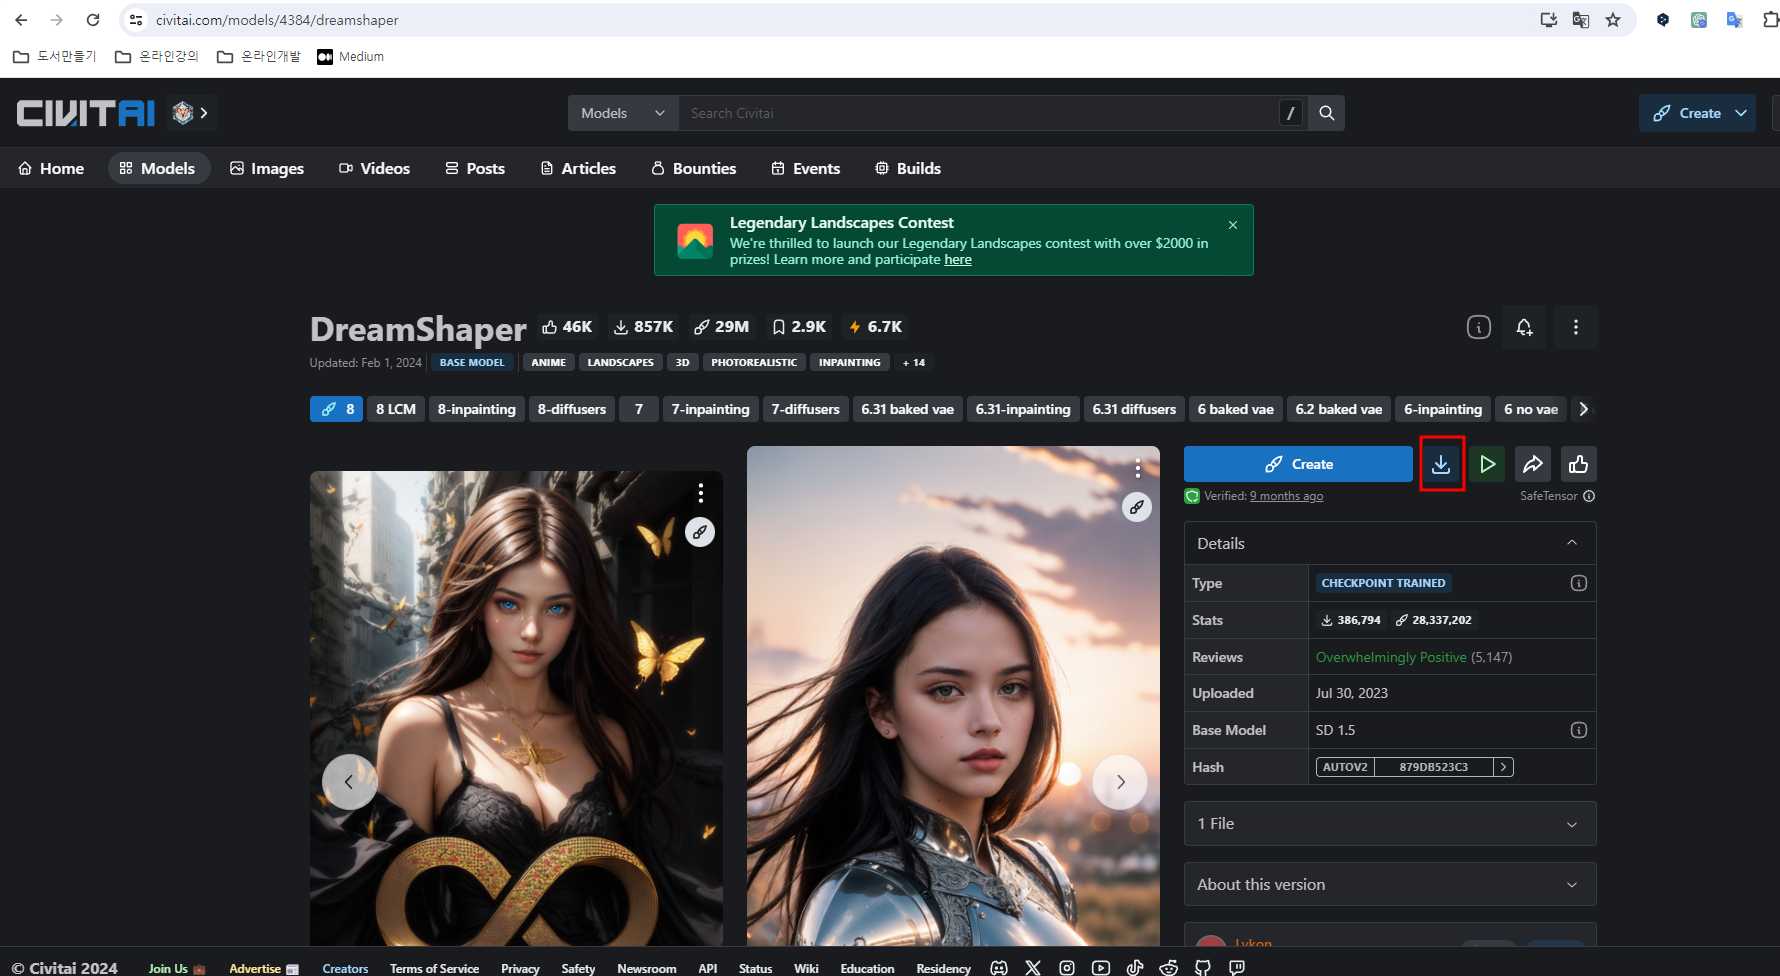
dreamshaper 풀모델 다운로드 사이트 주소는 다음과 같다.
https://civitai.com/models/4384/dreamshaper
DreamShaper - 8 | Stable Diffusion Checkpoint | Civitai
DreamShaper - V∞! Please check out my other base models , including SDXL ones! Check the version description below (bottom right) for more info and...
civitai.com
특정 유형에 사용되는 '로라'라는 작은 모델이 있으며, 일반적으로 결과를 향상시키기 위해 풀 모델과 함께 사용된다. 아래 그림과 같이 정원과 건축과 관련된 로라모델(lora_garden_architecture_Exterior_SDlife_Chiasedamme_V1.0)을 검색하고 다운받는다.
https://civitai.com/models/140626/loragardenarchitectureexteriorsdlifechiasedammev10
lora_garden_architecture_Exterior_SDlife_Chiasedamme_V1.0 - v1.0 | Stable Diffusion LoRA | Civitai
Website: https://stablediffusion.life Youtube: https://www.youtube.com/@hoangdiffusion Facebook: https://www.facebook.com/profile.php?id=1000849243...
civitai.com

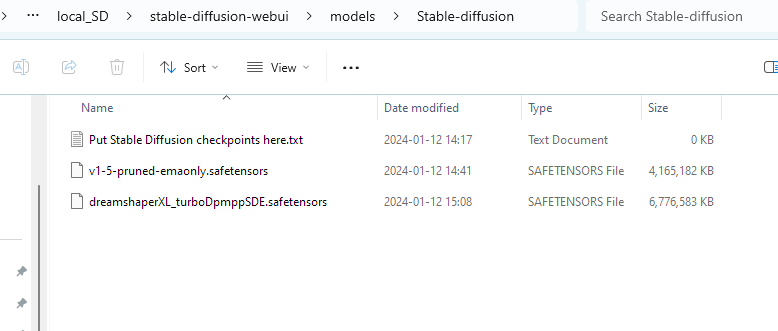
다운 받은 풀모델 파일은 C:\local_SD\stable-diffusion-webui\models\Stable-diffusion 폴더에 저장하고 부분 모델인 로라 모델은 C:\local_SD\stable-diffusion-webui\models\Lora 폴더에 저장한다.
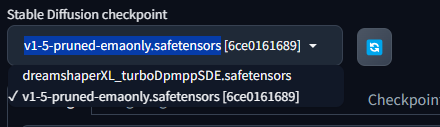
stable-diffusion-webui 프로그램 화면에서 다음 그림과 같이 refresh 버튼을 클릭한다.

아래 그림과 같이 드롭다운 버튼을 클릭해서 새롭게 갱신된 풀 모델 목록에서 사용자가 원하는 모델을 선택한다. 이미지를 생성학 위해서 여기서는 dreamshpaerxL 기본 풀 모델을 선택하여 이용한다.
7단계. 이미지 생성하기
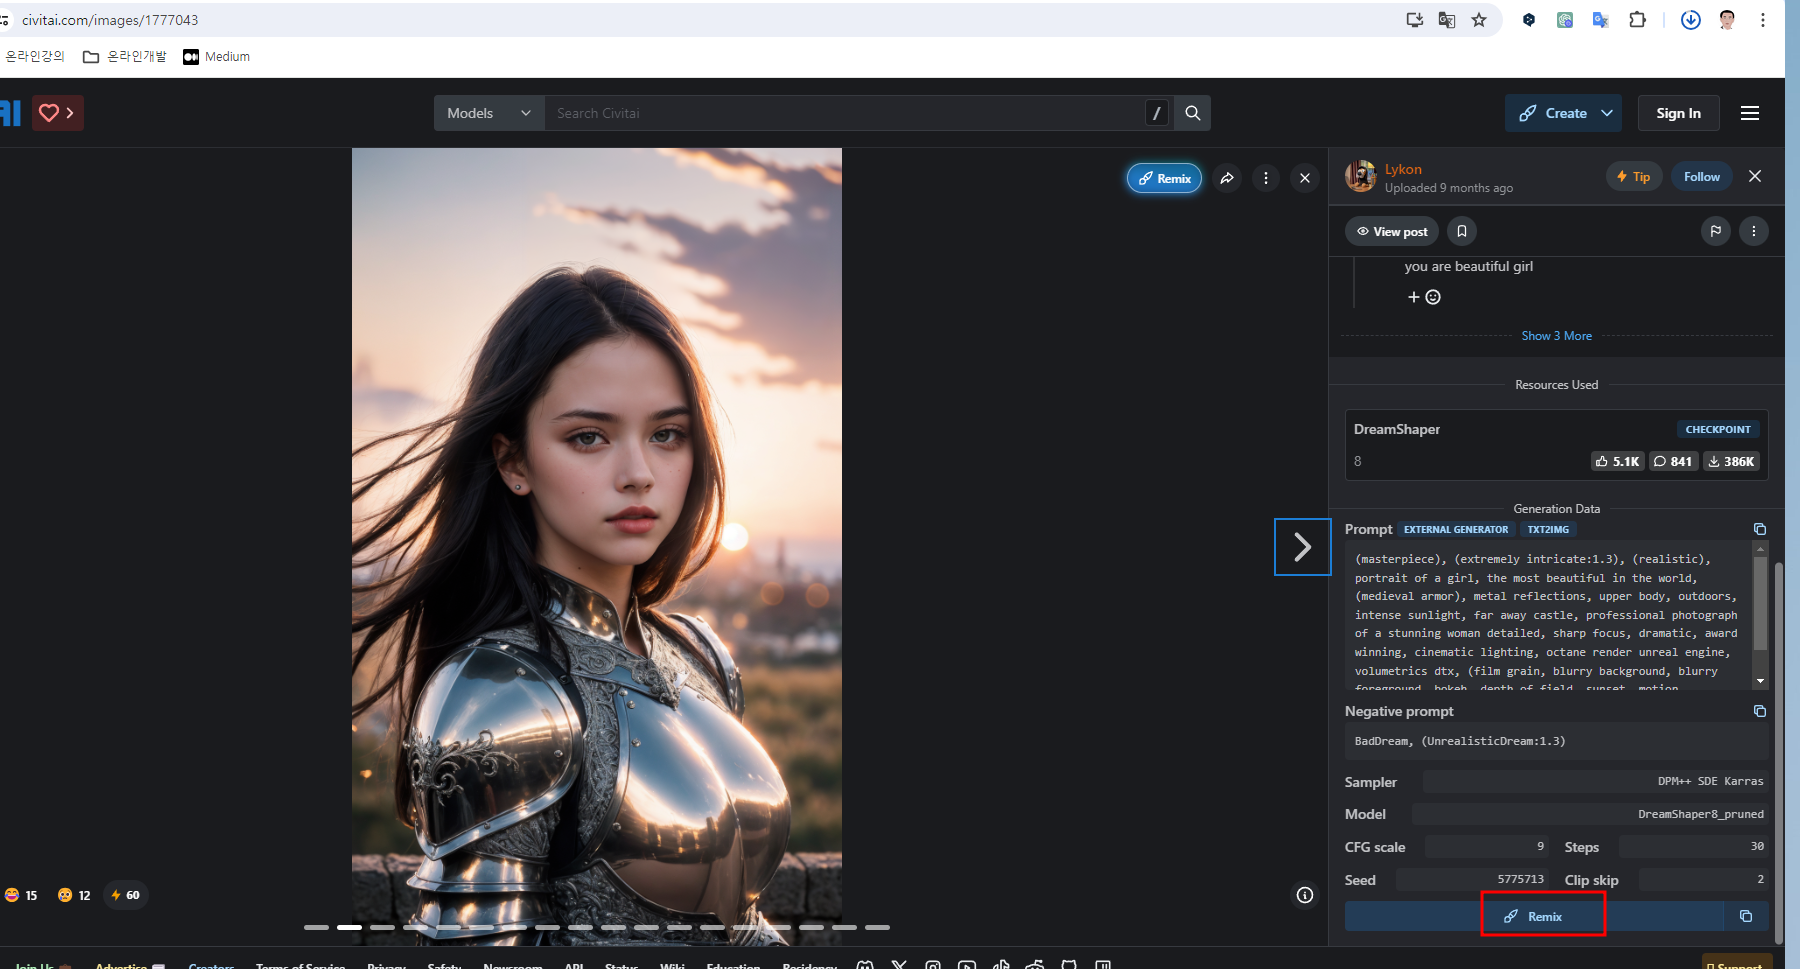
시작을 어떻게 할 지 모른다면 앞에서 다운받은 풀모델 사이트로 이동해서 원하는 이미지 유형을 찾는다.

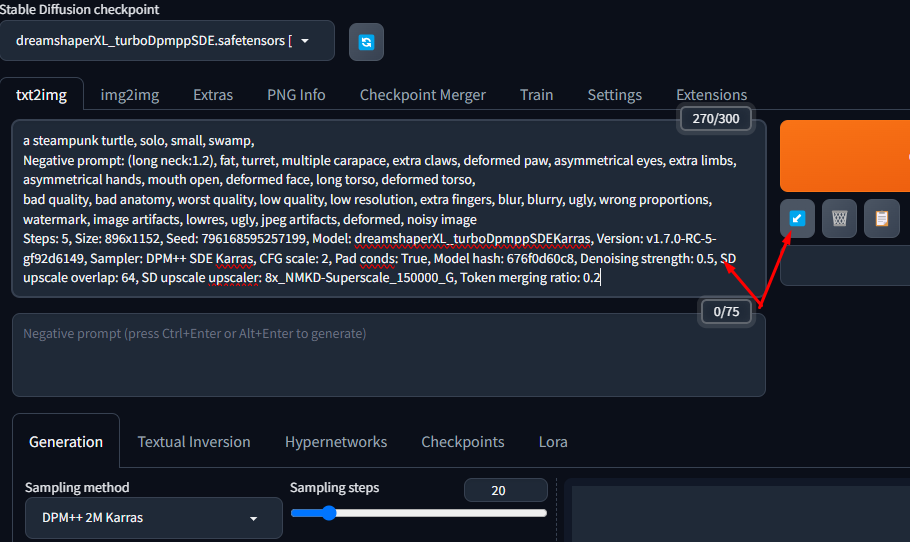
원하는 이미지 유형을 선택하고 이미지를 마우스로 클릭한 후 웹페이지에서 스크롤을 아래로 이동하여 ‘generation data' 또는 'Remix' 버튼을 클릭하여 이미지 생성과 관련된 문장을 복사한다.
최종적으로 ‘Generate’ 버튼을 클릭하여 이미지가 출력되는 것을 기다린다.
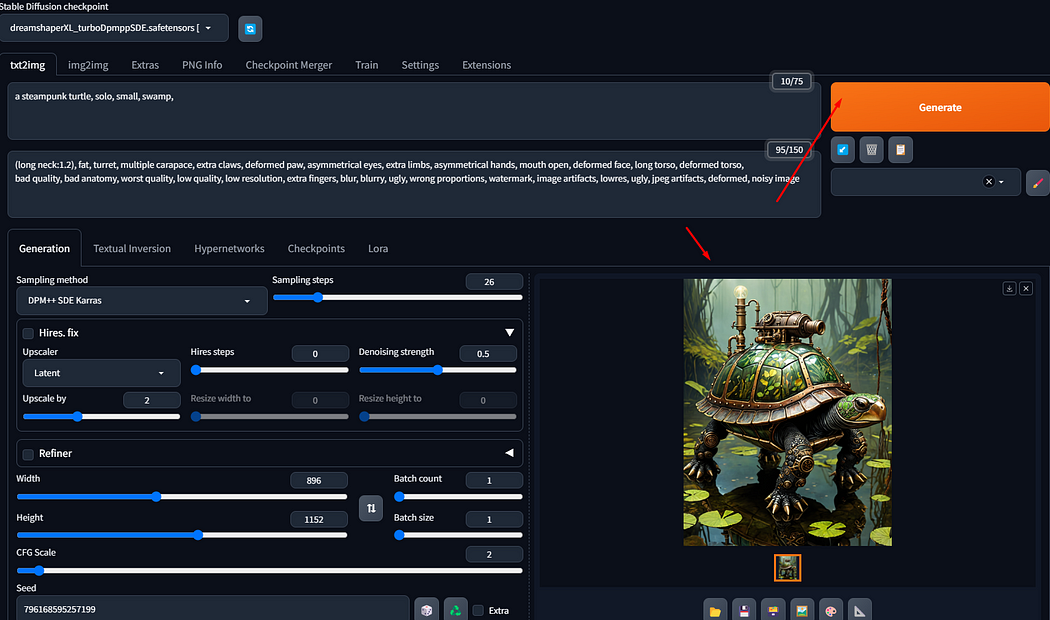
여기 몇가지 출력된 이미지이다. 비교적 짧은 시간에 현실적으로 이미지 품질이 매우 높고 재미있는 결과가 나왔다.

'생활 도움글' 카테고리의 다른 글
| 아나콘다 환경에서 스테이블 디퓨젼 포지(Stable Diffusion Forge) 설치 (0) | 2024.04.23 |
|---|---|
| AI 이미지 생성용 스테이블 디퓨전 설치하기- 로컬PC (2) | 2024.04.19 |
| 돈 버는 앱 테크 (0) | 2023.01.09 |
| 자동차세 연납, 9.15% 절세 (0) | 2022.12.28 |
| 13월의 월급...연말정산 연금저축·IRP 활용법 (0) | 2022.12.26 |